How to Sew Ribbons and Elastic on Pointe Shoes (2025)
![How to Sew Ribbons and Elastic on Pointe Shoes ([current-date format='Y']) sew ribbons and elastic on pointe shoes](https://kigofootwear.com/wp-content/uploads/2022/03/sew-ribbons-and-elastic-on-pointe-shoes-.jpg)
Pointe shoes are a requirement for ballet, but they usually don’t have elastic bands or ribbons to keep them on your feet. Since a well-fitting shoe is essential for dancing in pointe shoes, you’ll need to sew your elastics and ribbons onto the shoe. All you need is to calculate the length of ribbons and elastic, and sew the ribbon near the elastic for extra safety and style!
You can make yourself stand out on the stage by sewing ribbons and elastic on pointe shoes uniquely. You must know how to select an appropriate length of ribbons, then put it in the right position and then sew it using a running stitch.
So, follow the steps below to know how to sew ribbons and elastic on pointe shoes to create your matching footwear!
Definition About Pointe Shoes
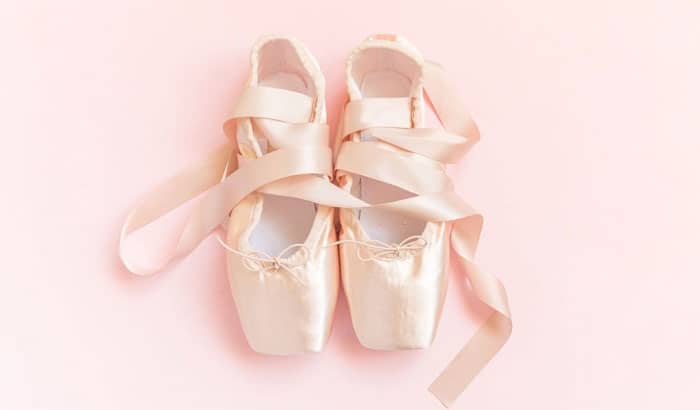
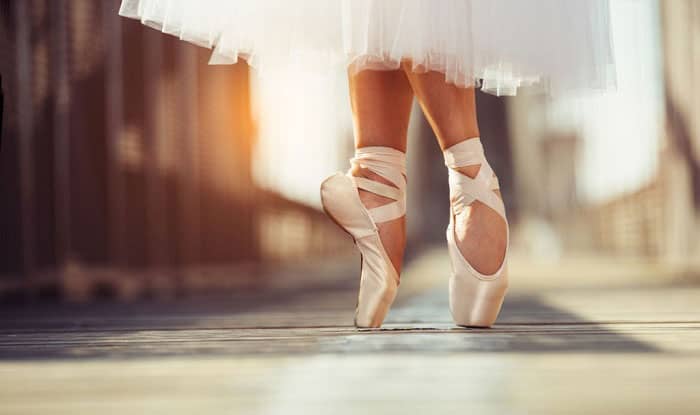
Ballerinas use pointe footwear, which enables them to move “en pointe,” or on the points of their toes. During a performance, ballet dancers utilize elastics and ribbons linked to their ballet slippers to hold them securely adhered to the ground.
Pointe shoe ribbon is usually not attached when you buy a new pair, so performers will stitch these items upon their footwear to personalize the fit and keep their shoes firm while performing.
Preparation
Before sewing elastic on pointe shoes, you must prepare such equipment to ensure to reach the best outcome:
- A pair of ballet shoes: Keep in mind that your ballet footwear should be well-fitted (preferably at an expert shoe fitting) since the return policy will not be valid anymore after your sewing pointe shoe ribbons.
- Ribbons and elastic: Opf for a specialized sort of fabric that is approximately one inch wide and made of synthetic material such as nylon or polyester. They usually come as a single 88-inch-long length of ribbon, and then you can cut it to fit your feet. Meanwhile, elastics for pointe shoes are supple but not blistering like ordinary rubber bands. Their width is often a half-inch.
- Sewing thread: A similar hue with the shoe color is a great choice for sewing thread to match the ribbon better.
- Other requirements: Pins, scissors, and sewing needles.
- Optional tools: Pencil
Main part: Step by step instruction on sewing ribbons and elastic on pointe shoes
In this article, I will show you two separate parts: How to sew ribbons and how to sew elastic on pointe shoes.
How to Sew Ribbons?
Step 1: Estimate position of ribbons:
To start, tuck the ball down towards the forefoot to confirm the exact location of your string. Create a pencil line from the rear seam to note the angle you’ve made. This is the angle at which you will stitch, as well as the location of the ribbon’s rear edge.
Step 2: Prepare pieces of ribbons in equal lengths
Choose a 1-inch wide nylon or polyester ribbon. Then cut that 88-inch long ribbon into 4 equal lengths (22 inches) and trim the ends. Burn the ends of each ribbon by holding them close to the flame until the material melts or hardens. This step is only optional, but ribbons that have been cut may fray, so bind the rear sides of your ribbons to minimize their chances of wearing and tearing.
Pro Tip: You can use a candle or lighter to light the ends of the ribbon. Keep a glass of water handy in case the ribbon burns.
Step 3: Fold the heel of the pointed toe down to the insole
This bend will produce a specific pattern across either side of the shoe, into which you will stuff ribbons. Draw a line with a pencil to help you arrange your ties.
Pro Tip: You can also put on your shoes and point your toes. Note the highest place of your arch.
Step 4: Tuck the end of the ribbon into the lines
Make sure the right/shiny side of the ribbon is far away from you and touching the liner. Place the other end of the ribbon about 45 degrees toward the toe of the shoe. Then, pull the ribbon into the fold about 2 inches, or twice the width of your thumb. This will ensure that you have enough for the next step.
If you’re wearing shoes, continue to use a pencil to mark the liner at the highest point of the arch. Do this for both sides of your feet.
Step 5: Prepare the needle
Put one end of the thread through the stitching eye, allowing it to fall a few inches from the eye—do not tie the thread to the needle. Tie a string or two on each other on the opposite end of the string, so it doesn’t slide through your foot.
Step 6: Sew the ribbon
Extend the heel so you can see the end of the ribbon again. Reposition the ribbon, if necessary, so that it matches your pencil marks. Fold the bottom part up twice so you can’t see the raw edge anymore. Try to keep the folded portion less than 1 inch, or equal to the width of your thumb.
Sew down the side of the ribbon using the needle. Start sewing just below the drawstring along the top edge of your pointe shoe and finish stitching at the bottom. Keep your stitches small and be careful not to sew through the outer satin or the drawstring.
When you get to the top edge, finish with a running stitch. A running seam is when you move the needle up and down through the fabric. It is also called a straight stitch. When you get back to where you started, tie the knot and trim the thread.
Step 7: Finish the process
Repeat the process for the other ribbons. Make a ribbon at a time, fold the two ends of the ribbon twice, then sew them inside your pointed shoe. Make sure that the matte side of the ribbon is inside of the shoe and the shiny side is facing out. When you’re done, do it with another shoe.
What About the Elastic?
After sewing ribbons on pointe shoes, you need to stitch the elastic to finish the process. But if you have succeeded in the previous method, this one is just a piece of cake!
Step 1: Calculate the size and position of the elastic
Some dancers like to sew the elastic right behind the ribbon. This way, after the ribbons are tied, the elastic won’t be visible. But others don’t since stitching elastic to footwear might cause blisters during performances.
To find an appropriate position for the elastic, stand up wearing your ballet shoes and wrap the tape measure over the top of your foot, from side to side of the shoe. Make sure you measure the full length of the inner sole.
Your elastic band should be snug enough to secure the top of your footwear in alignment while performing, but not so tight that it damages your Achilles tendon or blocks oxygen. Take off your pointe footwear and trim the elastic band to the appropriate length.
Step 2: Cut the elastic and pin it
Choose elastic about four inches wide. Match the color with your tights or with your ribbon. Cut two pieces to fit your measurements. You will have one for each shoe.
Pin the elastic to the shoe based on where you want it. If you’re going to sew the elastic inside, make sure that its ends touch the shoe lining. But when you’re going to sew the elastic to the outside, place the ends at the bottom of the heel.
Step 3: Try pointe shoes on and test the size
Put on your shoes and stand straight with your feet. If the elastic is too tight or uncomfortable, remove the shoe and adjust it. You may have to make it tighter, looser, or angle it differently.
Step 4: Sew the elastic on the shoe
Sew the elastic to the inside of the shoe. From the bottom edge, puncture the needle through a little bit of the shoe material, then back through. Continue with a stitch that runs along the top edge, just below the drawstring. Do the same for both ends of the elastic on the other shoe.
Conclusion
Now you know all the tricks to sew ribbons and elastic on pointe shoes. If you find this article on how to sew ribbons and elastic on pointe shoes helpful, don’t hesitate to leave us a comment! Hopefully, you can create your signature ballet footwear that gives you more confidence while performing.


